


If you are familiar with instant messaging / chatting or at least messaging, you might have come across emotion icons aka emoticons. Haven't you? Basically, emoticons are portraying facial expressions which comes in handy to convey your feelings or mood while drawing the attention of receiver. Imagine what if you could be using them in your blog comments as well. That could be fun, don't you think?
Emoticons
I don't think I'd need a few more lines to define what emotion icon is, and probably everyone who has been online or using mobile devices know exactly what I'm talking about. But according to Wikipedia:
An emoticon is a metacommunicative pictorial representation of a facial expression which in the absence of body language and prosody serves to draw a receiver's attention to the tenor or temper of a sender's nominal verbal communication, changing and improving its interpretation.
Yet, I believe a glimpse of emoticons would be the perfect definition ;)
Emotions for Comments
As you may have already anticipated, today I'm not going to talk about emotion icons, per se. I'm about to show you how you can integrate emoticons on your blog, so your readers can liven up their conversations with cute emoticons as well. Would that be a good idea? You decide :)
By default, in Blogger, even if a comment includes a smiley in text form, it interprets as text.

But once you integrate the smilies into your blog, the relevant text smilies (including the smilies in existing comments) will be converted to graphic images and rendered when you view the comment.

I've already discussed about adding emoticons for conversations, in 2011. By then Blogger didn't introduce their threaded comments feature for us bloggers. Now Blogger has threaded comments and if your blog has threaded comments enabled, you can follow the instructions and converse with smilies within your conversations.
Before You Go:
* Smilies are compatible with these comment form types - Embedded, Popup window and Full page. But unless you are using Embedded comment form, your readers won't be able to preview corresponding codes for smilies and they will notice after posting their comments. Hence I recommend switching to Embedded comment form.
If you think switching to Embedded comment form is a good idea, read How to Enable or Disable Comments in Blogger and change your comment form type to embedded comment form.
Steps:
1. Go to Blogger Dashboard.
2. Click on your Blog Title.
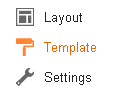
3. Now navigate to Template tab.
Note: Before editing your template, you may want to save a copy of it. Read How to Back Up Your Template.
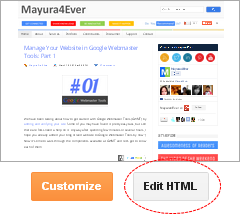
4. Click Edit HTML button.
5. Now search for the following tag within your template.
</body>
6. Add below line of code right before the </body> tag.
<script src='https://sites.google.com/site/mayura4ever/smiley-threaded.js' type='text/javascript'/>
7. Now find below line of code in your template,
<a expr:href='data:post.commentFormIframeSrc' id='comment-editor-src'/>
Note: You might encounter multiple search results and make sure you follow the same steps to each search result you come across.
8. Add below code snippet right before the line you found at above step. It will display available smilies for visitors above your comment form.
<div width: 100%; text-align: left; border: 0px solid #cccccc; padding: 5px 5px 5px 5px; background: #ffffff; height: 50px'> <b>
<img border='0' height='18' src='http://us.i1.yimg.com/us.yimg.com/i/mesg/emoticons7/21.gif' width='18'/> :))
<img border='0' height='18' src='http://us.i1.yimg.com/us.yimg.com/i/mesg/emoticons7/71.gif' width='18'/> ;))
<img border='0' height='18' src='http://us.i1.yimg.com/us.yimg.com/i/mesg/emoticons7/5.gif' width='18'/> ;;)
<img border='0' height='18' src='http://us.i1.yimg.com/us.yimg.com/i/mesg/emoticons7/4.gif' width='18'/> :D
<img border='0' height='18' src='http://us.i1.yimg.com/us.yimg.com/i/mesg/emoticons7/3.gif' width='18'/> ;)
<img border='0' height='18' src='http://us.i1.yimg.com/us.yimg.com/i/mesg/emoticons7/10.gif' width='18'/> :p
<img border='0' height='18' src='http://us.i1.yimg.com/us.yimg.com/i/mesg/emoticons7/20.gif' width='22'/> :((
<img border='0' height='18' src='http://us.i1.yimg.com/us.yimg.com/i/mesg/emoticons7/1.gif' width='18'/> :)
<img border='0' height='18' src='http://us.i1.yimg.com/us.yimg.com/i/mesg/emoticons7/2.gif' width='18'/> :(
<img border='0' height='18' src='http://us.i1.yimg.com/us.yimg.com/i/mesg/emoticons7/8.gif' width='18'/> :X
<img border='0' height='18' src='http://us.i1.yimg.com/us.yimg.com/i/mesg/emoticons7/12.gif' width='18'/> =((
<img border='0' height='18' src='http://us.i1.yimg.com/us.yimg.com/i/mesg/emoticons7/13.gif' width='18'/> :-o
<img border='0' height='18' src='http://us.i1.yimg.com/us.yimg.com/i/mesg/emoticons7/7.gif' width='20'/> :-/
<img border='0' height='18' src='http://us.i1.yimg.com/us.yimg.com/i/mesg/emoticons7/11.gif' width='18'/> :-*
<img border='0' height='18' src='http://us.i1.yimg.com/us.yimg.com/i/mesg/emoticons7/22.gif' width='18'/> :|
<img border='0' height='18' src='http://us.i1.yimg.com/us.yimg.com/i/mesg/emoticons7/35.gif' width='24'/> 8-}
<img border='0' height='18' src='http://us.i1.yimg.com/us.yimg.com/i/mesg/emoticons7/100.gif' width='31'/> :)]
<img border='0' height='18' src='http://us.i1.yimg.com/us.yimg.com/i/mesg/emoticons7/102.gif' width='44'/> ~x(
<img border='0' height='18' src='http://us.i1.yimg.com/us.yimg.com/i/mesg/emoticons7/104.gif' width='30'/> :-t
<img border='0' height='18' src='http://us.i1.yimg.com/us.yimg.com/i/mesg/emoticons7/66.gif' width='18'/> b-(
<img border='0' height='18' src='http://us.i1.yimg.com/us.yimg.com/i/mesg/emoticons7/62.gif' width='18'/> :-L
<img border='0' height='18' src='http://us.i1.yimg.com/us.yimg.com/i/mesg/emoticons7/14.gif' width='34'/> x(
<img border='0' height='18' src='http://us.i1.yimg.com/us.yimg.com/i/mesg/emoticons7/24.gif' width='30'/> =))
</b>
</div>
Color Indication Information:
- Background color of smiley display area
- Alignment of smilies and related code on display area
- Padding of smiley display area - Top, Right, Bottom, Left
- Width of smiley display area
- Height of smiley display area
9. Now search for the following line of code in your template,
10. Expand the set of code if needs to, and add the code snippet under step 8, right after the above line of code.
11. Now save your template.
12. Go back to view your comment section to find your cute smilies animating.

- Background color of smiley display area
- Alignment of smilies and related code on display area
- Padding of smiley display area - Top, Right, Bottom, Left
- Width of smiley display area
- Height of smiley display area
9. Now search for the following line of code in your template,
<b:includable id='threaded_comments' var='post'>
10. Expand the set of code if needs to, and add the code snippet under step 8, right after the above line of code.
11. Now save your template.
12. Go back to view your comment section to find your cute smilies animating.
Note: Smilies will only be rendered after submitting the comment, not while you're composing it.
Enjoy :-)
