

Do you take photos with Instagram? Instagram is a photo sharing platform and can be defined as a social network where users can engage with other Instagram users. Now this one gonna come in handy if you are already on Instagram and managing a blog or website. Else, of course you can try it out after having an account and playing with photos on Instagram. Dear Instagram fans, did you ever wanted to show off Instagram photos on your blog or website?
What is Instagram?
If you don't know the first things about it, let me take you through it briefly. Unlike other photo sharing platforms such as Picasa or Flickr, Instagram is dedicated for mobile users. Instagram mobile application available for mobile platforms such as iOS and Android. You can take snaps via application or add a stored photo in your mobile and the best comes next. Instagram has numerous photo filters to apply and transform original image into another creative. After all, you can share your photos with friends and family on Instagram. Plus, on other social platforms too. Does it makes sense? If not, you gotta try Instagram on your mobile device and get the whole idea ;) Well, now back to the business.
Embedding Instagram Photos
Instagram has no official widget for this matter, but SnapWidget is a third party widget which offers capability of embedding Instagram photos on blogs or websites, with many customization options and easy set up. You can either show off your own Instagram photos by using your Instagram username or else you can display photos filtered with a specific hashtag. The widget is absolutely free to use and there are 3 type of widgets too - Grid, Slideshow and Map. All you need is customizing widget as you need and embed the given code on your site. Here I'm gonna talk about free version where you don't even need to register for an account. If you wish to get more exclusive features, you can try Pro version too. Are you ready to embed your favorite Instagram photos?
Steps:
1. Go to SnapWidget website.
2. Now scroll down and find Customize your widget section.
3. You can start set up by either entering Instagram username or a hashtag of your choice in relevant field.
4. Now select the Widget Type you need. You can see how they looks like below and I'll run you through specific options available for each widget type.
Grid
The photos will display in a grid as you see below and you can change how much photos need to be displayed across and down using Layout option.

Thumbnail Size - This will define the size of photo(s) used in the widget in pixels
Layout - Specify how the widget needs to display photos
Photo Border - You can enable or disable border around the photos
Background Color - You can set the background color of the widget or leave it blank for transparent
Photo Padding - Specify space between photos on the widget
Hover Effect - Select an effect to apply on photos to be seen when someone hover the mouse pointer over photos
Slideshow
Here your selected photos will run in a slideshow. Only one photo per slide will be displayed.

Thumbnail Size - This will define the size of photo used in the widget in pixels
Photo Border - You can enable or disable border around the photos
Background Color - You can set the background color of the widget or leave it blank for transparent
Hover Effect - Select an effect to apply on photos to be seen when someone hover the mouse pointer over a photo
Map
Here the photos you need to be displayed will be on a map and arranged according the specified location of the photos.
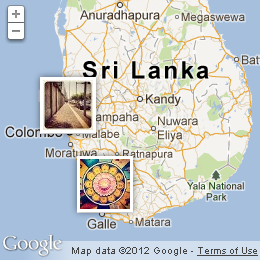
Map Size - Specify the size of the map in pixels
5. Now click on Preview button to see how your widget looks like with the photos you selected.
6. Once you done with customization and satisfied with the preview, click Get Code button to grab the code for your personalized widget.
7. Now copy the widget code snippet it offers and add to your blog or website.
Note: If you are a Blogger user and wanna add it as an element, you can add your button code snippet via HTML/JavaScript element. Read How to Add an External Widget or Codes to Blogger. Else if you wanna render it in a Blogger post or page, read How to Embed External Content on Your Blogger Posts or Pages.
Enjoy :-)
