


How do you get traffic to your blog? Search engines do help bring you targeted traffic to your blog. Also, your content being shared or recommended on social networks gives extra exposure and welcome interested visitors too. Talking about promotion, you can try blogging directories, groups / communities and simply allow others to share your content to spread the word. Have you?
In addition, we have discussed how you can increase engagement via copy and paste activity happens on your site too. But how do you promote your archived content on your own blog for visitors land on your blog? You can show popular posts for visitors to get more exposure on your content, but what you gonna do about not so popular but archived content?
It's always better if you can show off your old or archived content for new visitors, so you can increase engagement for buried content from homepage. Either you can show them on sidebar or right below the posts to find siilar content after reading your posts. But to get more attention for them, you have to try an attention grabbing strategy of display or present them. A pop up? It would be great, but very annoying as it distracts readers. Isn't it? How about showing recommendations on a side of your website, either left or right, without distracting readers? Facebook Recommendations Bar offers similar functionality.
In addition, we have discussed how you can increase engagement via copy and paste activity happens on your site too. But how do you promote your archived content on your own blog for visitors land on your blog? You can show popular posts for visitors to get more exposure on your content, but what you gonna do about not so popular but archived content?
Grab Attention of Visitors
It's always better if you can show off your old or archived content for new visitors, so you can increase engagement for buried content from homepage. Either you can show them on sidebar or right below the posts to find siilar content after reading your posts. But to get more attention for them, you have to try an attention grabbing strategy of display or present them. A pop up? It would be great, but very annoying as it distracts readers. Isn't it? How about showing recommendations on a side of your website, either left or right, without distracting readers? Facebook Recommendations Bar offers similar functionality.
Why Recommendations Bar?
Facebook Recommendations Bar has a quite similar way of displaying recommended posts as on Recommendation Box. It shows content being shared on Facebook for your readers. The plugin is minimized initially with just like or recommendation button on it and it will expand automatically after the time you defined has been elapsed or if trigger is initiated. So it let visitors like or recommend your posts too.
Remember nRelate related posts widget? Recommendations Bar seems similar to them as the plugin shows "You Might Also Like" heading along with recommended posts. However it doesn't showing exactly related posts, but popular and most liked, recommended or shared content on the Facebook. If your posts has never been shared on Facebook, it won't show recommendations on the plugin. Wanna show off recommendations for your visitors too?
Remember nRelate related posts widget? Recommendations Bar seems similar to them as the plugin shows "You Might Also Like" heading along with recommended posts. However it doesn't showing exactly related posts, but popular and most liked, recommended or shared content on the Facebook. If your posts has never been shared on Facebook, it won't show recommendations on the plugin. Wanna show off recommendations for your visitors too?
Before You Go:
* Unless if you implemented Facebook JavaScript SDK in your blog, you have to add it before you proceed with steps. Read How to Implement Facebook JavaScript SDK on Your Website and implement suitable JavaScript SDK version for you.
* Make sure you have implemented Facebook like button or send button on your blog, so it's easy for visitors to like or send your posts on Facebook and to display on Recommendations Bar.
* It's recommended by Facebook to implement Open Graph tags in your blog to render posts correctly. But it's not compulsory anyway. If you interested, implement Facebook Open Graph Protocol on your blog.
Steps:
1. Go to Blogger Dashboard.
2. Click on your Blog Title.
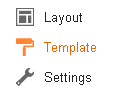
3. Now navigate to Template tab.
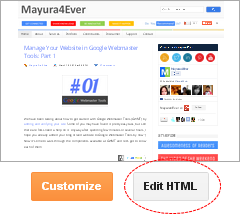
Note: Before editing your template, you may want to save a copy of it. Read How to Back Up Your Template.
4. Click on Edit HTML button.
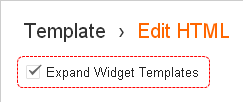
5. Tick on, Expand Widget Templates option.
6. Now grab the code snippet for Facebook Recommendations Bar plugin from below. You can either use XFBML or HTML5 markup.
XFBML Markup
<b:if cond='data:blog.pageType == "item"'>
<fb:recommendations-bar trigger="onvisible" read_time="[Wait Time]" action="recommend" side="right" site="[Site URL]" num_recommendations="2"></fb:recommendations-bar>
</b:if>
<fb:recommendations-bar trigger="onvisible" read_time="[Wait Time]" action="recommend" side="right" site="[Site URL]" num_recommendations="2"></fb:recommendations-bar>
</b:if>
Note: The XFBML markup of this plugin may not support earlier versions of Internet Explorer. In order to enhance compatibility with older Internet Explorer versions, add below XML namespace to your root HTML tag.
i.e: <html b:version='2' ..... xmlns:fb="http://ogp.me/ns/fb#">
xmlns:fb="http://ogp.me/ns/fb#"
i.e: <html b:version='2' ..... xmlns:fb="http://ogp.me/ns/fb#">
HTML5 Markup
<b:if cond='data:blog.pageType == "item"'>
<div class="fb-recommendations-bar" data-trigger="onvisible" data-read-time="[Wait Time]" data-action="recommend" data-side="right" data-site="[Site URL]" data-num_recommendations="2"></div>
</b:if>
<div class="fb-recommendations-bar" data-trigger="onvisible" data-read-time="[Wait Time]" data-action="recommend" data-side="right" data-site="[Site URL]" data-num_recommendations="2"></div>
</b:if>
Color Indication Information:
- Trigger Value
Here you need to specify when to expand the recommendation bar. The default value is onvisible, which expands your plugin when a reader pass by the plugin code snippet placed on your site. For example, if you have code snippet implemented just after the content of your page, the plugin will expand as user reaches the end of content.
Instead, you can use a percentage value, so when visitor scrolls and reaches the percentage of the page you specified, the plugin will expand. For example, if you specified 20%, the plugin will expand once user scrolls 20% from the top. However if the Wait Time triggers first, then plugin will expand before user reaches the percentage.
Instead, you can use a percentage value, so when visitor scrolls and reaches the percentage of the page you specified, the plugin will expand. For example, if you specified 20%, the plugin will expand once user scrolls 20% from the top. However if the Wait Time triggers first, then plugin will expand before user reaches the percentage.
- Wait Time
You can specify a time (in seconds) to wait before the plugin expands automatically - i.e: 10. Even if you have a Trigger Value specified, the plugin will expand once it reaches the wait time.
- Button Text
Here you can change the button text on plugin which refers to the action. By default, it display as Recommend. You can change it to Like if you need. Just specify like here if you need so.
- Side
Here you can specify on which side of screen the plugin should be rendered. By default, it specified to be rendered on bottom right side. If you wanna show it on bottom left side, specify left here.
- Your Site URL
Enter your blog or website URL here.
- Number of Recommendations
Here you can specify how many recommendations should be displayed on the plugin. By default it shows 2 recommendations and you can show up to 5.
7. Now paste the selected code snippet right after the following line of code in your template.
<data:post.body/>
Note: Adding the code snippet after <data:post.body/> along with onvisible option enabled, will expand your plugin once the reader finish reading your blog post. You can place the plugin code anywhere between <body> and </body> tags if you familiar with HTML or editing template.
8. Save your template changes.
Enjoy :-)

Aww very nice! Great tutorial! :)
Thanks Brenda :) I hope you will love to have it on your blog too. It gives more exposure to your older content and attention grabbing.
Thanks for our compliments dear :)
Cheers...
Hey buddy..unfortunately i tried this and its not working..i tried to do it carefully with the steps, i even added it after the tag and not only after tag just to see if it works there..still nothing..i added also my site url on the specific place of this widget but still nothing..any help is appreciated :D
Hi Andreas,
It's strange enough. Are you sure that you have implemented JavaScript SDK on your blog mate? :)
Cheers...
yeap..i used the basic one which you gave first..but as i see now i forgot to implement the facebook like button on my blog..omg :D
Oops ;) You may have it. And if your posts never been shared on Facebook or liked, the plugin has nothing to show mate :)
I've tested it on a test blog and it has no like button or posts never been shared on Facebook. You know what, the plugin doesn't appear, but same code works on this blog. So you might wanna try it with like button and when your posts get more likes and shares, plugin may start to render :)
Cheers...
i see..yes now i understand completely my friend i ll use it and see how it goes..thank you so much!! I have also some other issues not so important but need to be fixed so if you have some extra time i can tell you about them and help me maybe to fix them..just a couple of problems!!
You're welcome mate :) Sure, drop your questions at Support section where discuss external questions. I ll help as I can.
Cheers...
ok thank you so much friend!! :)
Another great tutorial! Clear and to the point. Profiling yourself - or your blog - is very important to your blog and business. People decide what they will read but recommendations count!
Hi Jan,
I do hope you love the way it works and Facebook is expanding integration on blogs and websites with their social plugins. However I'm glad if Facebook has a way to shows exact related content for current page. Anyway Facebook grabs data via likes and shares. So we can't expect much more :)
Thanks for stopping by and yeah, for your wonderful compliments mate :)
Cheers...
I used both in blogger template just above and nothing workes. I used both XFBML and HTML5.
Hi Shukla,
Do you have Facebook like button implemented on your blog? If your posts hasn't been liked or shared on Facebook, the recommendation bar won't populate.
Cheers...
I have fb like box and like icon in sharebar. But this recommendation bar is not working.
Hi Shukla,
Go to Official Facebook Recommendation Bar page and enter your domain name in the relevant field. If recommendation bar isn't appear there, it means your posts hasn't been shared or liked on Facebook, or Facebook having a problem with crawling your blog. If so, the control is out of our hands and you better implement recommendation box later on and see if it's working.
Cheers...
Hey its not working on my blog. Also, I have four instances of
. So, I pasted the code just after the first one with the onVisible attribute. Not working, what may be the reason.
Hi Bhaskar,
Can you just place the plugin code right after tag or just before tag and see if it's working? :)
Cheers...