July 1, 2011

How to Add a Custom Header in Blogger


By default, Blogger offers you a default static blog header including title and description of your blog. Further you can display image or logo with your header too. Does it bugging you? The way how your header is. Do you think you could have done more to your header if you can use a custom header instead of default one? If you are not prefer the default header style, you will seek around a way to customize or add a custom header for your blog. As far as if you have tried it by yourself, you may have find that current blog header is cannot move a bit or remove it. So you might have wonder why you can't remove default Blogger header and add a new custom header to your blog. Still wondering?

It seems you can't touch or remove default header to use custom header, but you are absolutely wrong until you find how to do it. Blogger made the header element locked by itself to not to remove by general users. So they have to use default header with blog title, description and eligible header image. But it doesn't mean Blogger doesn't let you hack it and implement a new one. You just need to find how to do it. Here we will discuss how to remove your current header safely without affecting to your existing blog and let you implement your own header on it. I hope you would love to go through and add your own custom header to show off to your visitors. Why waiting? Let's start.

Before You Go:

* If you wanna know how to customize the existing blog header, read How to Customize Your Header in Blogger.

* If you are looking for adding a header image for you blog using dynamic views, read How to Add a Header Image for Dynamic Views in Blogger.


Steps:

1. Navigate to your Blogger Dashboard.

2. Click on your Blog Title.

3. Move on to Template tab from left pane.


Note: Before editing your template, you may want to save a copy of it. Read How to Back Up Your Template.

4. Click Edit HTML button.
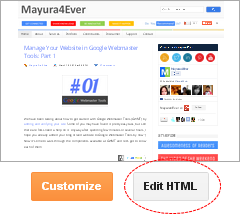

5. Now search for following or similar line of code in your template which relates to your blog header section and alter attributes using regarding attribute information indicated.

<b:section class='header' id='header' maxwidgets='1' showaddelement='no'>

Color Indication Information

   - Maximum Widgets in Header Section

This attribute specifies the maximum number of widgets can be included in header section. The default value is 1. So, by default, you can't add widgets more than one for your header section. By changing this value, you can allow adding more widgets for header section.

i.e: <b:section ... maxwidgets='3' ...

   - Enable/Disable Adding New Elements

Though you specified a new maxwidgets attribute value, you may not see Add a Gadget link at Page Elements page until you change this attribute value to yes. Change value to yes as you gonna add new custom header.

i.e: <b:section ... showaddelement='yes'

6. Now you can add custom header for your blog. But before you proceed, let's remove current header on your blog. You can find the line similar to below, just after the line of code we discussed in step 7.

<b:widget id='Header1' locked='true' title='Header (Header)' type='Header'/>

7. Change the locked attribute value to false.

i.e: <b:widget id='Header... locked='false'...

8. Now Save Template.

9. Go to Layout tab.


10. Find the Header element of your blog.


11. Now click Edit link correspond to the header.

12. On the immediate pop-up box, click Remove button and confirm removal.

13. Now your default header has been removed. You can see Add a Gadget link at the place where default header was placed before. Click on the link to implement custom header.

14. Now find suitable element for header from the gadget list. You can add image box if you prefer adding custom image as your header or else HTML/JavaScript element to implement header with dynamic or static content with the help of your HTML knowledge.

Note: You can add more gadgets which seems to be suite to your header section (except to the main header) upto the number of widgets you allowed in the header layout code at step 7.


Enjoy :-)

67 comments:

Butterfly Kisses Photography said...

Thx so much!

Mayura De Silva said...

You are welcome mate :)

Cheers...

Nomali Cele said...

You are awesome! My title is a bit to the left, but maybe it's just the picture size. Thank you so much!.

Mayura De Silva said...

You are welcome Nomali/Minenhle :)

If you have further issues on this criteria, please feel free to drop your comments or use our Support section if you need specific assistance.

Cheers...

Bongo Tube said...

Thank you! It really helped alot.. Well, I am using a custom template, and it seems that I have two Headers, so the one I just cutomised moved to the left.. I was wondering, what should I do to make move it to the centre to cover the whole top area ?
Thanx in advance!

Mayura De Silva said...

Hi Mate,

I just visit your blog and see standard header there :) What did you use as your header? An image? If you use standard header, you have to use content with exact width of your header mate. Else remove standard header and add HTML/JavaScript element where you can easily manage your image. If you wanna add custom HTML/JavaScript element, read How to Add an External Widget or Codes to Blogger.

Cheers...

Leslie Astor said...

Hi There,
I have been going nuts trying to replace my Minima title header with a customized text title. I followed the instructions above but still can't see my custom header. Weirdly, the custom header shows up when my blog is viewed on a mobile device, but not on a computer. Any advice or help you could offer would be greatly appreciated!
Leslie
www.craftingabeautifullife.blogspot.com

Mayura De Silva said...

Hi Leslie,

I just try to visit your blog. But it says "Blog not found". Did you restrict your blog from public? :)

Cheers...

Leslie Astor said...

Hi Mayura,
I'm not sure why you're getting that message. My blog isn't restricted or blocked from public viewing.
Did you click on the link in my comment or try trying it in manually? I copied and pasted the URL I left in my last comment and that worked just fine. Maybe you need the http:// first? (Though I never do.)
Thanks!
Leslie

Mayura De Silva said...

Ooops... :) Now I can view your blog. However you are still having standard header with the title "CRAFTING A BEAUTIFUL LIFE"? If so, can you add custom header and let me know right after mate? :)

Cheers...

Leslie Astor said...

Uh, I thought I had done that already. I don't know how to delete or sidestep that standard header. Blogger won't let me skip adding a title.

Mayura De Silva said...

Owh... Did you remove your previous header from your blog as described in this tutorial mate? :)

Cheers...

Leslie Astor said...

FINALLY figured it out. Took me ages to find the "Page Elements" tab-I had to revert to the old Blogger layout to see it.
Thanks so much for your help. Much appreciated!
Best,
Leslie

Mayura De Silva said...

Hi Leslie,

Glad you figured it out at last... :) Happy blogging...

Cheers...

bronze said...

Thank you so much! I was pulling my hair out trying to get rid of the header. You made it so easy. Your site is now in my favorites.
Thanks again,
Bronze

Mayura De Silva said...

You are welcome :) Glad you make use of it.

Cheers...

Anonymous said...

Realy thank you

Mayura De Silva said...

You're welcome mate :) Hope you find it helpful...

Thanks for stopping by :)

Cheers...

Prakhar Gethe said...

great post......really nice .extremely.well explained.....thank u so much

Mayura De Silva said...

You're welcome Prakhar :) Hope you've already customized your header.

Thanks for stopping by and leaving your compliments mate :)Cheers...

Jaimie Fayt said...

If you don't mind my asking, how did you create your header? The design with your favicon and adding the custom search as well? I would like to try something similar for my own blog.

Mayura De Silva said...

I've designed it myself mate. I had to work about 2 days to come up with this design. It's not favicon, it's my blog logo. Well, both are same :) You can add your own custom search like that, read Add a Customized Search Engine for Your Website. But people have different designing skills. Go with yours.

Cheers...

Jaimie Fayt said...

Could you tell me what you used to design it? Is the whole header one photo...? 

Mayura De Silva said...

I've been using Photoshop, Powerpoint and that stuff. Yeah, it's an image :)

Cheers...

Jaimie Fayt said...

Merci. 

Ana Lilia said...

Fantastic! Thank you so much! I couldn't find a way around this until I came across your tutorial. You rock! Thanks again. =)

Mayura De Silva said...

Hi Ana,

I'm really glad you made it following this tutorial. Yeah, custom headers matters if you think about your blog design. Now you did it :)

Thanks for comment and compliments...

Cheers...

Carelia Moran said...

You are Awesome..I started a new blog about a month ago and I needed this info to customize my header. Thanks so much.

Mayura De Silva said...

Hi Carelia,

You're welcome dear :) Glad you find it helpful and now you figured out how to get rid of standard header. Enjoy blogging :)

Cheers...

Alex Chivers said...

I am interested in adding a second header below my default header, but I want it to contain links (a kind of index).  I believe it would be the same sort of thing as your heder for HOME: Subscribe: Reviews: Resources ETC.  Can you help?  my email is chivs86@hotmail.com

Mayura De Silva said...

Hi Alex,

It's not a header mate :) They are tabs referring to each static pages on my blog. You can learn how to display tabs at How to Display Your Standalone Pages in Blogger post. If you have questions related to that, comment under that post.

Hope it helps...

BTW don't expose emails in public mate :) It's a threat to your privacy.

Cheers...

Fazi Khan said...

You are awesome! My title is a bit to the left, but maybe it's just the picture size. Thank you so much!.

Mobile Price in Pakistan

Bundle Wade said...

I am having a very hard time trying to find the code (or similar) as specified in point #7. Any ideas on how I could do this? I am using one one the simple Blogger default templates.

Mayura De Silva said...

Hi Wade,

You don't need to search for whole line when you do the search :) Just use part of it such as widget id and keep searching until you find the right one...


Hope it helps :)


Cheers...

summer thrills said...

Helped me lots! Thanks :)

Mayura De Silva said...

You're welcome Summer :) Glad you find it helpful.


Thanks for coming and sharing your compliment :)


Cheers...

Luke Henderson said...

hi, i did the change, but how i can i add a random image each time the page loads?

Mayura De Silva said...

Hi Luke,

Oops... A random image for header? Probably a random image is possible if you use animation as your header to change the image over time mate. Or else you can use flash animation created by you, but that will affect on page performance though.


Hope it helps :)


Cheers...

alice said...

thank you so much this really helped me!!!

Mayura De Silva said...

You're welcome Alice :) Glad to help you out with the tutorial.


Thanks for stopping by and commenting :)


Cheers...

George R. Jenkins said...

Thank you for that great tip! Worked perfectly.

Mayura De Silva said...

You're welcome and really glad to hear it was helpful George :)


Thanks for coming by and sharing your comment mate :)


Cheers...

Tasha W said...

Thanks for the awesome post! Very helpful! I am wondering if there is a way to make my header image bigger though? When I followed your steps my header image was still the size of just the main header text area (blog title) (400x94) Is there any way for me to make it sit at the top centered and be the width of my blog?

Mayura De Silva said...

Hi Tasha,

Well, your header size is 1000 x 120 dear :) But seems like the template designer changed the header size to be 400 x 94.

You can try following steps here and add HTML / JavaScript or Image element as the header. Use an image with 1000 x 120 size there :)


Cheers...

wythlovy said...

Thank you so much. This work perfect.

Mayura De Silva said...

Gld to hear it has been helpful :)


Thanks for coming by and sharing your comment :)


Cheers...

nicki said...

i cant find the proceed button

Mayura De Silva said...

Hi Nicki,


You can continue to next step :) Seems some blogs doesn't show a warning message with Proceed button.


Cheers...

Rushil said...

Thank you so much! This was a great help! Do you have more posts about blogger? I'd love to go through them!

Mayura De Silva said...

Hi Rushil,

You're welcome and glad to hear it has been helpful mate :)

You can check out more Blogger posts here ~ Blogger

Cheers...

Rhi93 said...

This was so helpful! Thank you so much this was just what I was looking for.

Mayura De Silva said...

Hi Rhi,


Awesome! Glad to hear you have found it helpful dear :)


Thanks for dropping by and letting me know :)

Cheers...

mahendra singh solanki said...

Thank u so much sir....

Mayura De Silva said...

You're welcome Mahendra :)


Cheers...

Kanishk said...

Awesome! thank!

Mayura De Silva said...

You're welcome Kanishk :)

Ms. V said...

It worked! Thanks so much for this!

Mayura De Silva said...

You're welcome, Ms. V :) Glad to hear you have made it!

Karurosu said...

Hi!

I've installed this template called Johny Templar (see my blog: http://karurosuphotoshop.blogspot.de/) but I've got no idea on how to use a photo of my creation as the header for the blog. I've got an HTML/Javascript box instead of the Header box. Do you know how I can place my photo at the top of my blog (where it says Experiments) using that HTML/Javascript box? And how to know the size of the photo to fix the header?

Anonymous said...

Najlepsza baza programów dostępne na https://programy.net.pl. Tylko programy do pobrania

Anonymous said...

tanie prezenty świąteczne prezenty na święta

Anonymous said...

oferta sts na dziś

Anonymous said...

skincell pro mole and skin tag remover - What are the benefits of skin cell pro? I was looking for a cure-all product to use on my face that would make my problem go away. My face had always been prone to acne and had several scars from acne. However, my skin was dry, and the acne had largely disappeared. I didn't have any breakouts, yet I decided to give skincell pro a try. I read several reviews online and was intrigued by the positive feedback I got from others.

Anonymous said...

Sprawdź numer polskiego konta bankowego na najtańszy bank konto osobiste

Anonymous said...

skincell pro price skincell mole and skin tag remover by lyncvoiceuc.com

Anonymous said...

skincell pro price skincell pro price

Anonymous said...

lost key

Post a Comment