


You love performing customizations on your blog, aren't you? Blogger is a free blogging platform to convey your ideas, information you have gathered and helps you to build a community around you too. It's completely free. You know what I mean? If you had to build it yourself, you will cost more than you imagine and due to the Blogger service, you just need to own a blog, create your content and publish only. Blogger doesn't ask you for anything in return, so you won't cost anything to use Blogger platform and to build your blog on it. But as you make use of Blogger platform, it's better if you can be grateful by mentioning or linking back to Blogger website. Well, actually if you own a blog on Blogger, it has been already mentioned on your blog footer. Do you have any idea of customizing blog footer element? It's actually called Attribution element. If so, you will notice that Blogger has been made it inaccessible. How about making it accessible and editable?
Earlier on we have discussed about customizing blog header which is usually inaccessible by default on How to Customize the Header in Blogger post. As like we made it possible, you can make changes to your Attribution element too. Yeah, it's inaccessible by default. But few changes in your blog template can make things better. If you wish to display a different attribution message or like to customize blog footer totally, you would love to know how to edit or get rid of Attribution element first. If so, you don't wanna wait for a small talk. Just proceed with steps below and still remember that you are on Blogger platform, so still better you can be grateful for being powered by Blogger.
Steps:
Steps:
1. Go to Blogger Dashboard.
2. Now click on your Blog Title.
3. Navigate to Template tab.
Note: Before editing your template, you may want to save a copy of it. Read How to Back Up Your Template.
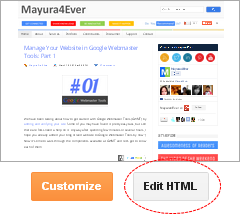
4. Click on Edit HTML button.
5. Now you have to find the code of attribution element. Search for the code snippet similar to below in the template,
<b:widget id='Attribution1' locked='true' title='' type='Attribution'>
6. Now alter the attribute locked value to false in the line of code, which cause element unable to remove.
i.e: <b:widget id='Attribution1' locked='false' title='' type='Attribution'>
7. Now you will able to remove attribution element. But still you won't be able to add any element to your page footer. So you need to change another line of code to allow adding elements to footer. Find the code snippet similar to below from the template.
<b:section class='foot' id='footer-3' showaddelement='no'>
8. Now change attribute value showaddelement to yes as below,
<b:section class='foot' id='footer-3' showaddelement='yes'>
9. Now Save template.
10. Navigate to Layout tab from left pane.
11. Find Attribution element bottom of the page.

12. Click on Edit link correspond to the Attribution element.
13. Now click Remove button on pop up window.
14. Now Attribution element has been removed. You can add another element using bottom Add a Gadget link to add custom attribution or any other element.
15. Click Save arrangement button.
Enjoy :-)
